1.2. Install on macOS 10
1.2.1. Install Python 3.8
The Mac comes with Python pre-installed, but the default Python is the outdated version 2.7. Since January 1st, 2020 no new bug reports, fixes, or changes have been made to Python 2, and Python 2 is officially no longer supported. SimCenter tools require Python 3.8. If you have not yet installed Python, we recommend installing Python 3.8 from Python.org, using the macOS 64-bit installer. The installer will place a python3 executable in your PATH.
Warning
The latest version of Python is 3.9.1. Certain Python modules required by SimCenter applications fail under Python 3.9 in the pip install process detailed below. If you already have Python 3.9, we recommend installing a Python 3.8 as well that you will use only for the SimCenter applications.
Note
We use the python.org installation over others, due to it’s simplicity of installation.
The current Python installer leaves two script files in the Python directory at the end of the installation. You need to execute both script files to get Python set up correctly so that it can be invoked from the terminal. To execute the files, double click on them. The two files, shown in the image below, are:
Update Shell Profile.command.shandInstall CertificateCommand.sh.
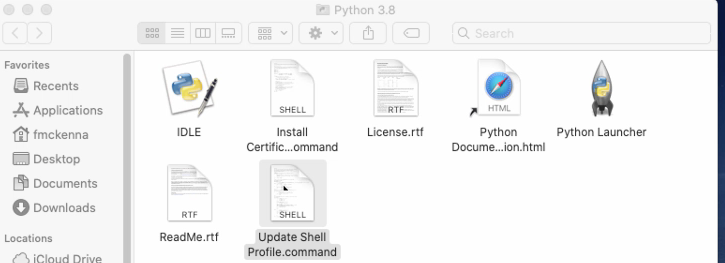
Fig. 1.2.1.1 Python: Folder Displayed at Conclusion of Install
Once Python is installed, you need to extend it by installing a few additional packages. To facilitate this phase of the installation, we created a nheri_simcenter python package that automatically installs all other dependencies. Start a Terminal window and type the following command:
pip3 install nheri_simcenter --upgrade
Note
You can use the spotlight app (magnifying glass at the top right corner of the desktop) to start a Terminal window. Start the spotlight app and type in terminal. The Terminal application should appear as the top hit.
Make sure you see a message that confirms the successful installation of the nheri-simcenter package before proceeding to the next step.
Note
If you forget to invoke the UpdateShellProfile.command.sh script at the end of the install, you can always edit the correct shell file later to update the PATH variable to point to the Python application.
On Linux systems, the shell is the program that takes commands from the keyboard that you enter in the terminal window and passes them to the operating system to perform by invoking applications and passing data between applications. In the good old days, it was the only interface available to the user, i.e., there was no such thing as Finder! There are a number of shell programs that can be installed and made available to you. The most popular is the bash shell, the up and coming one is the Z shell. Power MacOS users will write shell scripts to do many many useful things. By default the applications that the shell program will invoke are limited to applications in a few specific directories that are defined in the users PATH. Users can modify this path by editing files that the shell program will read from everytime the program is started.
When the frontend application is running the computations it is actually running a backend application using the shell program. As a consequence the shell program must be made aware of the locations of some of the external applications that you have installed as OpenSees and Dakota do not provide installers that automatically do this when they are installed. Other applications, like Tcl provide scripts that you invoke to do it. In short you have to edit the file appropriate to the shell you are using.
To find which shell program you are using when you issue commands inside the terminal window, type the following:
env | grep SHELL
If the result is /bin/bash you will need to edit the .bashrc file or the bash_profile file. If the result is /bin/zsh you will need to edit the .zshrc or .zprofile. Typically, the .bash_profile or the .zprofile file is the one to edit as by design these will invoke the .bashrc or .zshrc file. If in doubt, look for these files in your home directory and see which of these other installers have modified.
1.2.2. Install Java
Note
Java is needed to use OpenSHA to characterize the regional seismic hazard (see Earthquake Scenario Simulation). If you do not plan to use that feature, you can skip this step of the installation.
If you have not yet installed Java, please download the latest installer from java.com , run it, and follow the on-screen instructions to install Java.
Note
The Java website should automatically detect your operating system and offer the corresponding installer for you to download. Make sure you see “Mac OS X” at the top of the page before downloading the installer.
1.2.3. Download the Application
To download the R2D app, navigate to the R2D Download page which should resemble Fig. 1.2.3.1. The download page contains a list of downloadable files and directories.
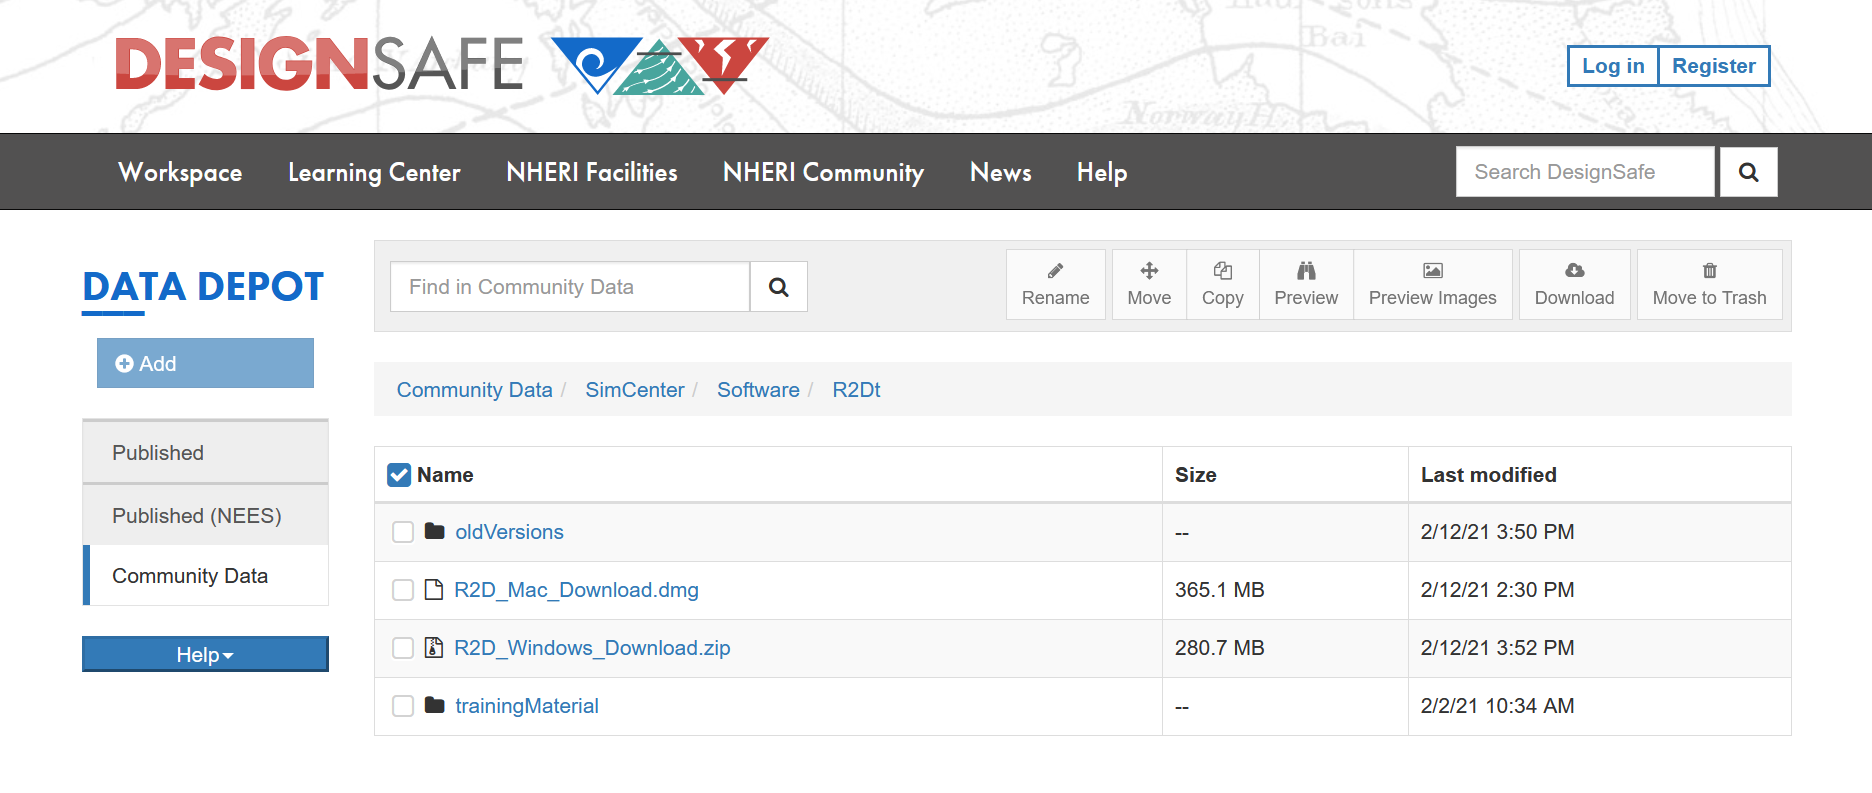
Fig. 1.2.3.1 R2DTool download page.
Click on the file with a name ending with Mac_Download.dmg to download the R2D app. In the pop-up window, click on the Download button in the bottom right corner. After the download has completed, open the dmg file and copy the R2D app application to a location in your filesystem.
Note
We suggest copying the application to your Desktop. After copying the application, you can move the dmg file to the trash or eject it.
1.2.4. Test the Installation
Once the installation procedure has been completed, it is a good practice to run some basic checks. Navigate to the location where you placed the application and open it by running the R2D.exe executable. You should see the user interface shown in Fig. 1.2.4.1. The installation can be tested by running the example problem r2dt-0006 which is provided with the installation.
Note
SimCenter apps are code-signed and notarized, but because they are not downloaded from the operating system’s app store, they may not be recognized as such. As a consequence, depending on your security settings, when you start a SimCenter app for the first time, your operating system may bring up a dialog box indicating it is unsafe. If this dialog should appear, hit the cancel button. Restart the app by right clicking on it and selecting open.
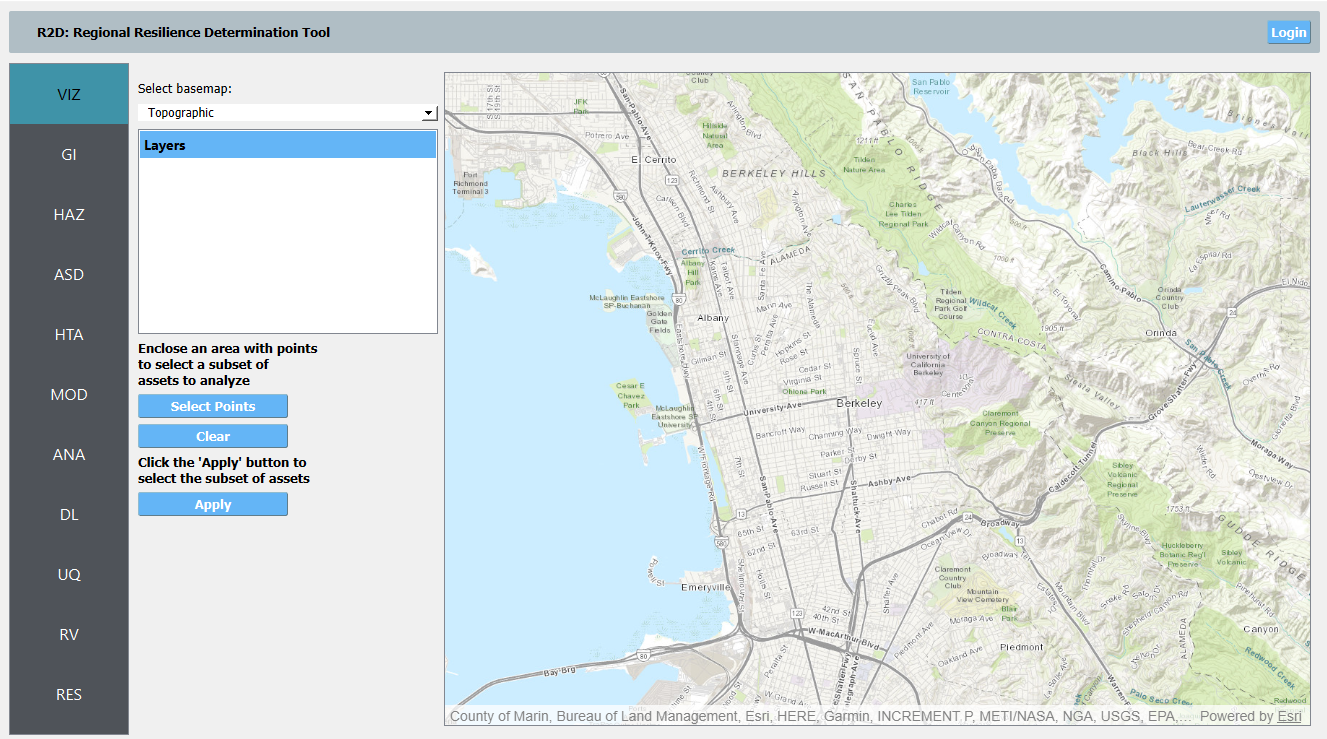
Fig. 1.2.4.1 R2DTool on startup.
Note
When the R2D app is running, open the File/Preferences and make sure that python3 appears under External Applications:Python. If you used older versions of SimCenter tools this was not the default.